
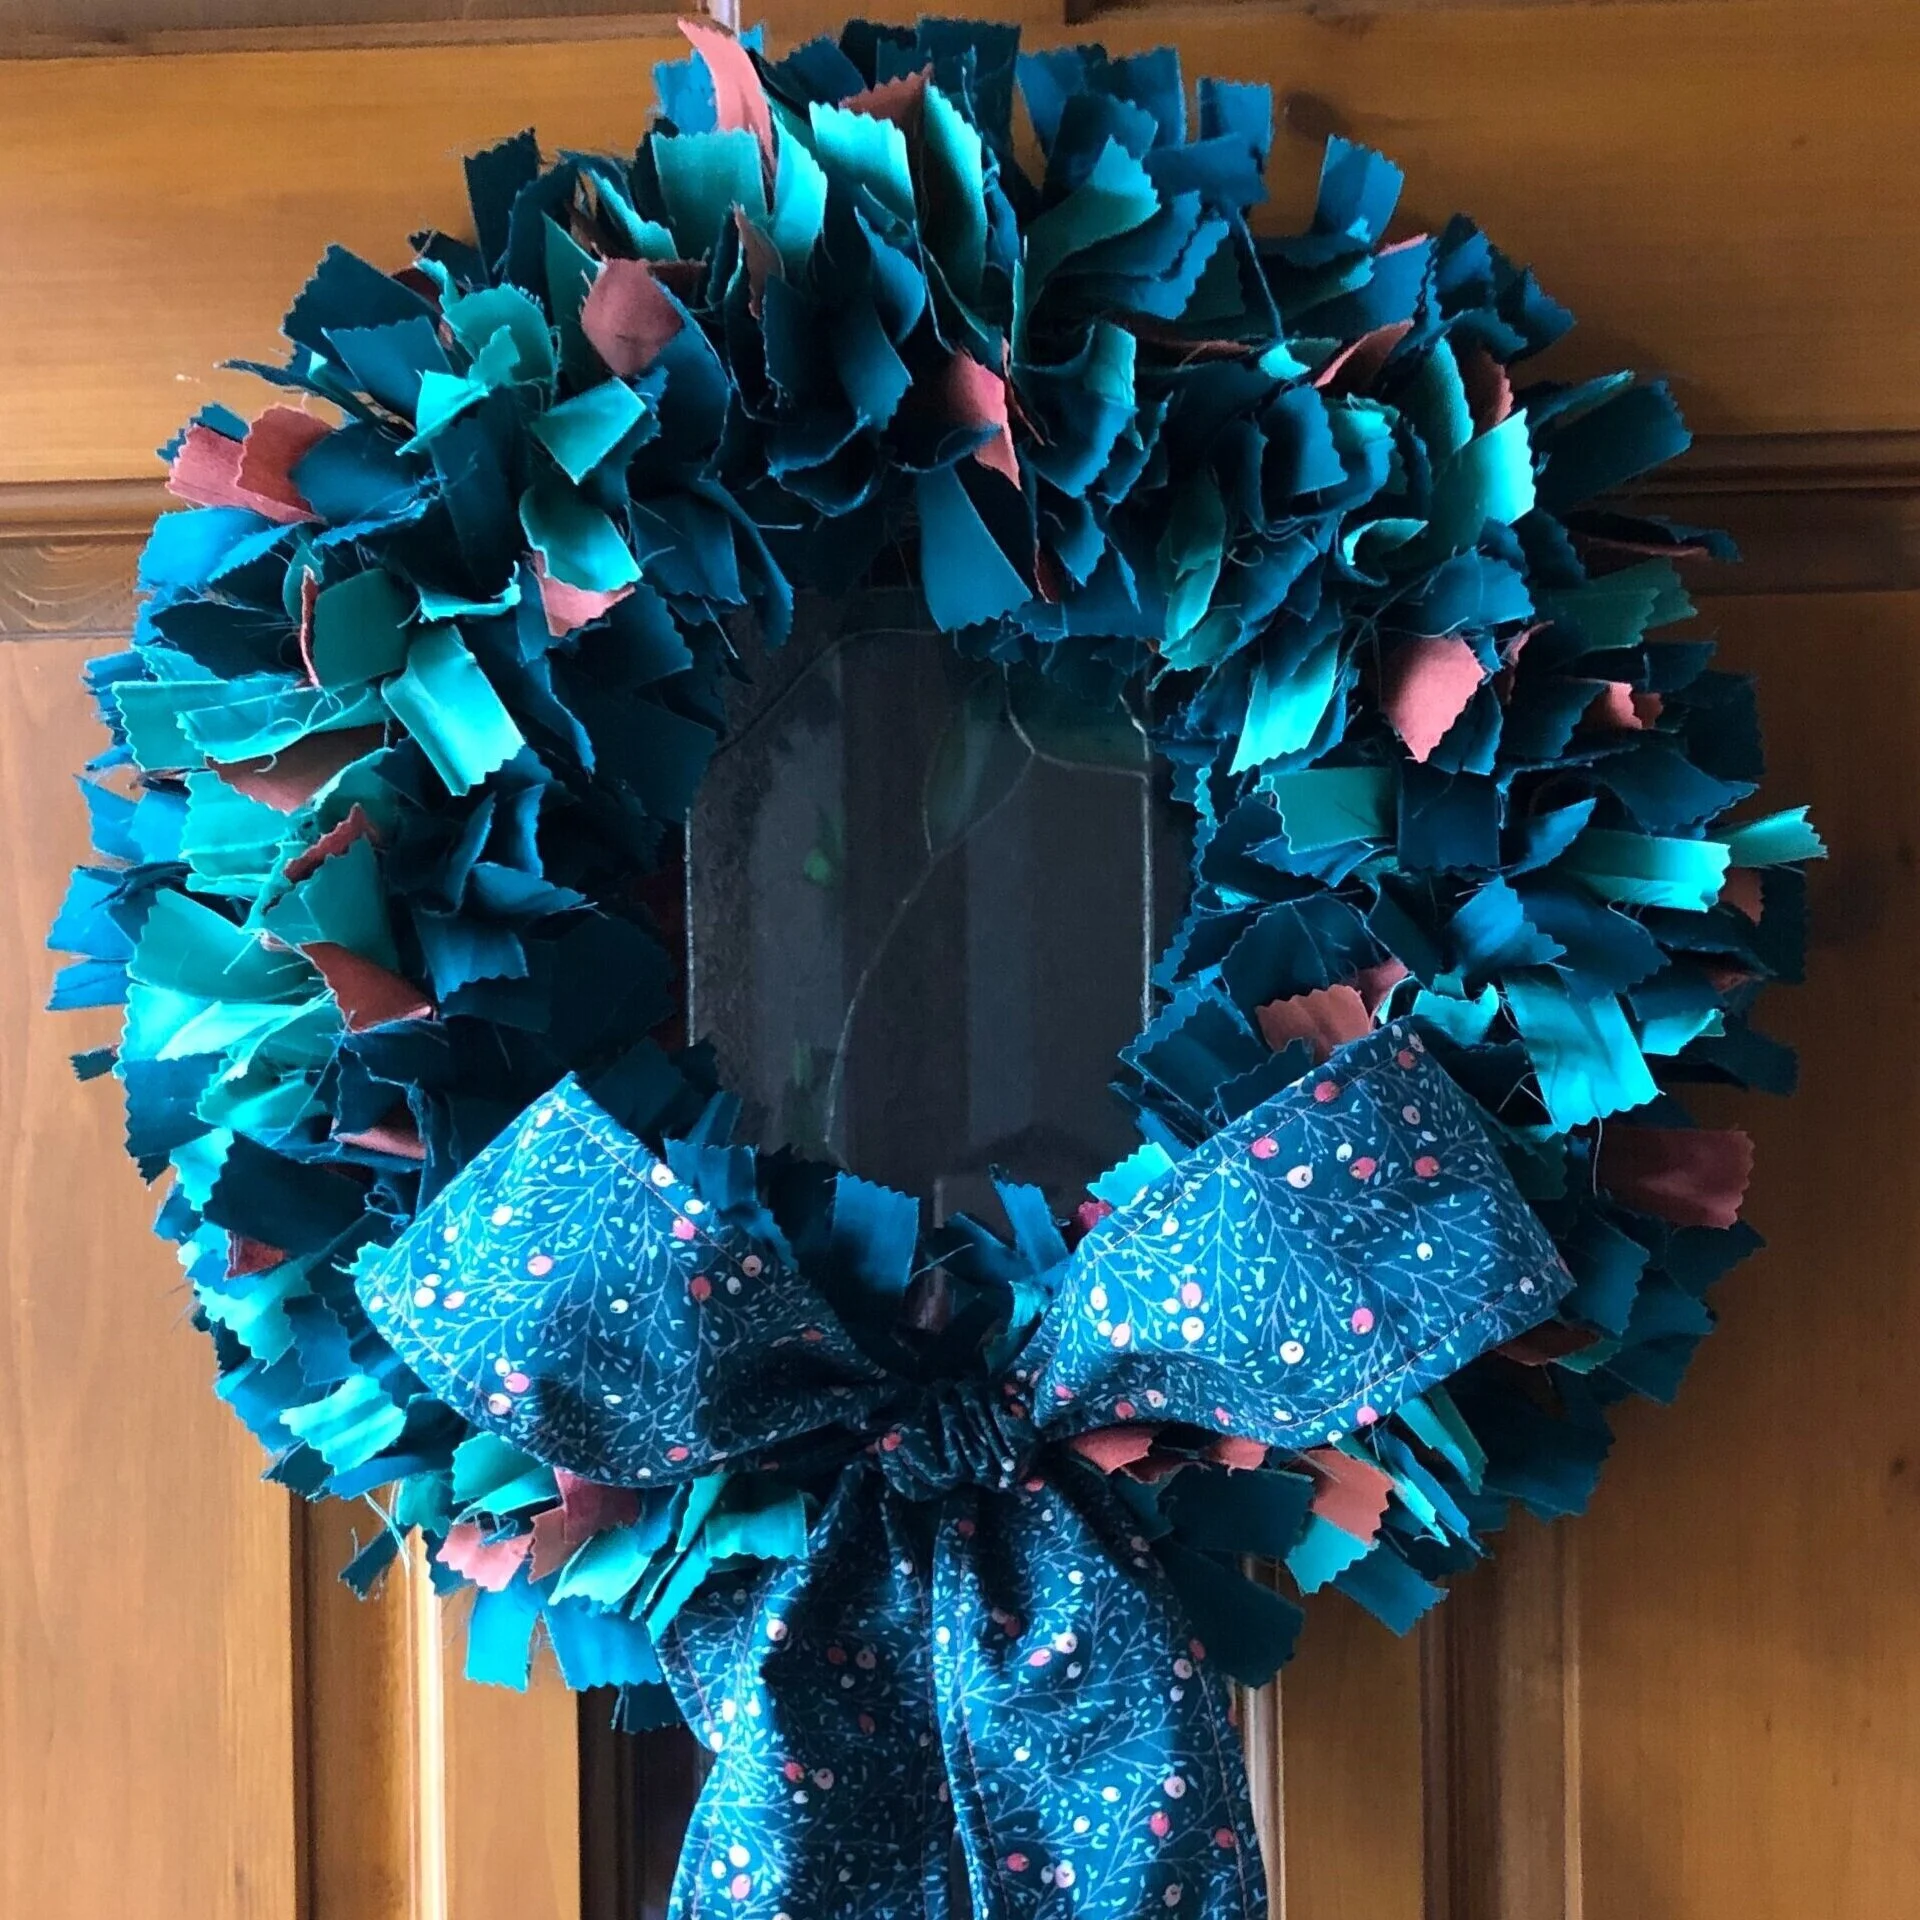
Christmas Rag Wreath with Shapable Fabric Bow: Tutorial & Tips
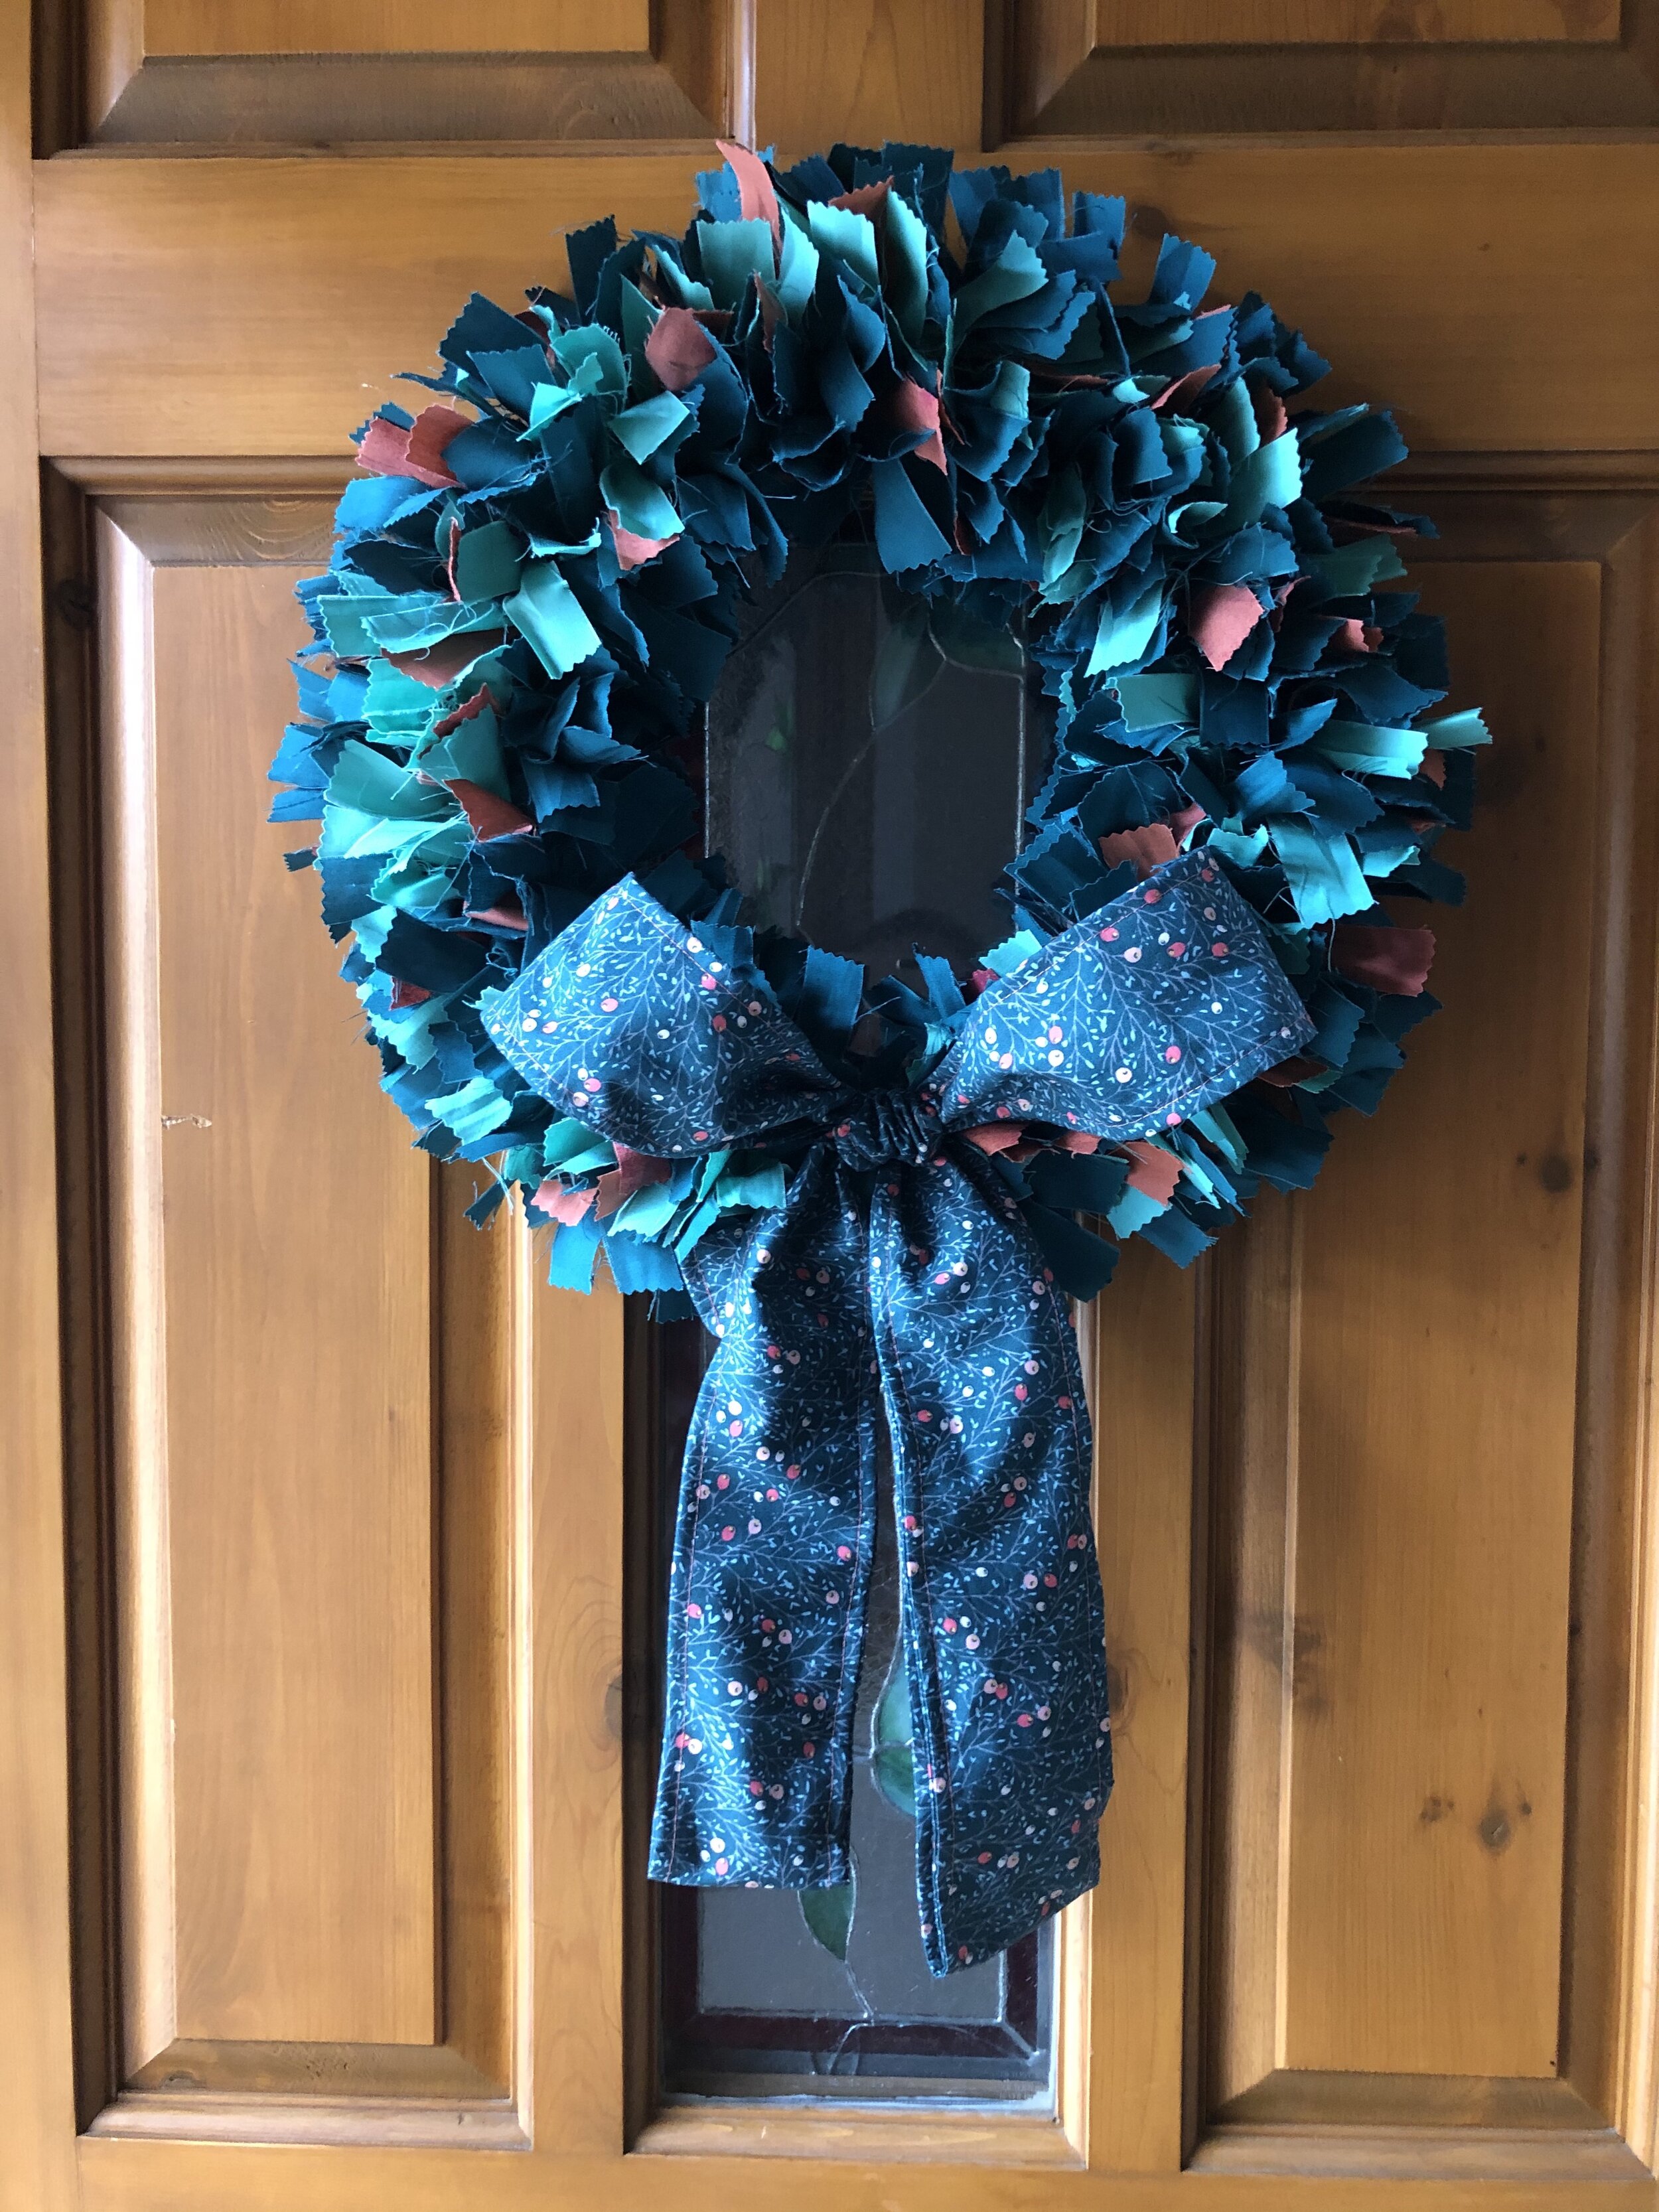
I’ve seen a whole lot of these rag wreaths all over the internet and decided to make one for my front door! I knew I would be adding a bow made of quilting cotton, but wanted to make it so that it would hold it’s shape. I thought about trying interfacing, but settled on adding wires into little sewn tubes or channels. It worked really well, and the directions for this are below.
My initial belief was that I would be able to make a 14” wreath with my scraps, but I didn’t have enough holiday fabric in my scraps OR stash. So I bought a beautiful print with which to make a bow, and then some Bella Solids and a Grunge to make the rags for the wreath. I had a lot of fun with this project, but as always, learned a few things I’d do differently next time. I’ll list those things first, then write out a sparser outline of instructions at the end for those of you hoping to skip my ramblings (if that’s you, scroll down to the Heading “Rag Wreath Instructions.”
Lessons for Next Time
1) I would have bought less fabric. I got 2.5 yards of fabric of three colors for the wreath and what I really needed was a total of 2 (2.25 yards at the most).
2) I would have invested in a pinking rotary blade. I began tearing the fabric and the torn look was awful to me. So I rotary cut the strips, then cut from those long strips with a pinking shear. I loved the look of the pinking shorn (?) edges. And I do not love the look of the fraying on the rotary cut sides. I’ll survive, but next time I’ll invest in a pinking blade.
3) I would have made my bow shorter. Basically the tails were so long I folded them under. Not a huge deal, but shorter tails to start would have been better.
Rag Wreath Instructions
Supplies:
A total of 2 to 2.25 yards of Fabric for wreath. (I used 1 and 1/3 yards of Moda Bella Dark Teal, 2/3 yards Moda Bella Bayside, and 1/2 yard of Moda Grunge Rouge)
14” Metal wire wreath frame
1/3 yard fabric for bow (I used Art Gallery Fabrics Merry & Bright Winterberry Spice)
26 Gauge wire for bow
Pinking Shears recommended, or scissors
Pinking Rotary blade recommended
Directions:
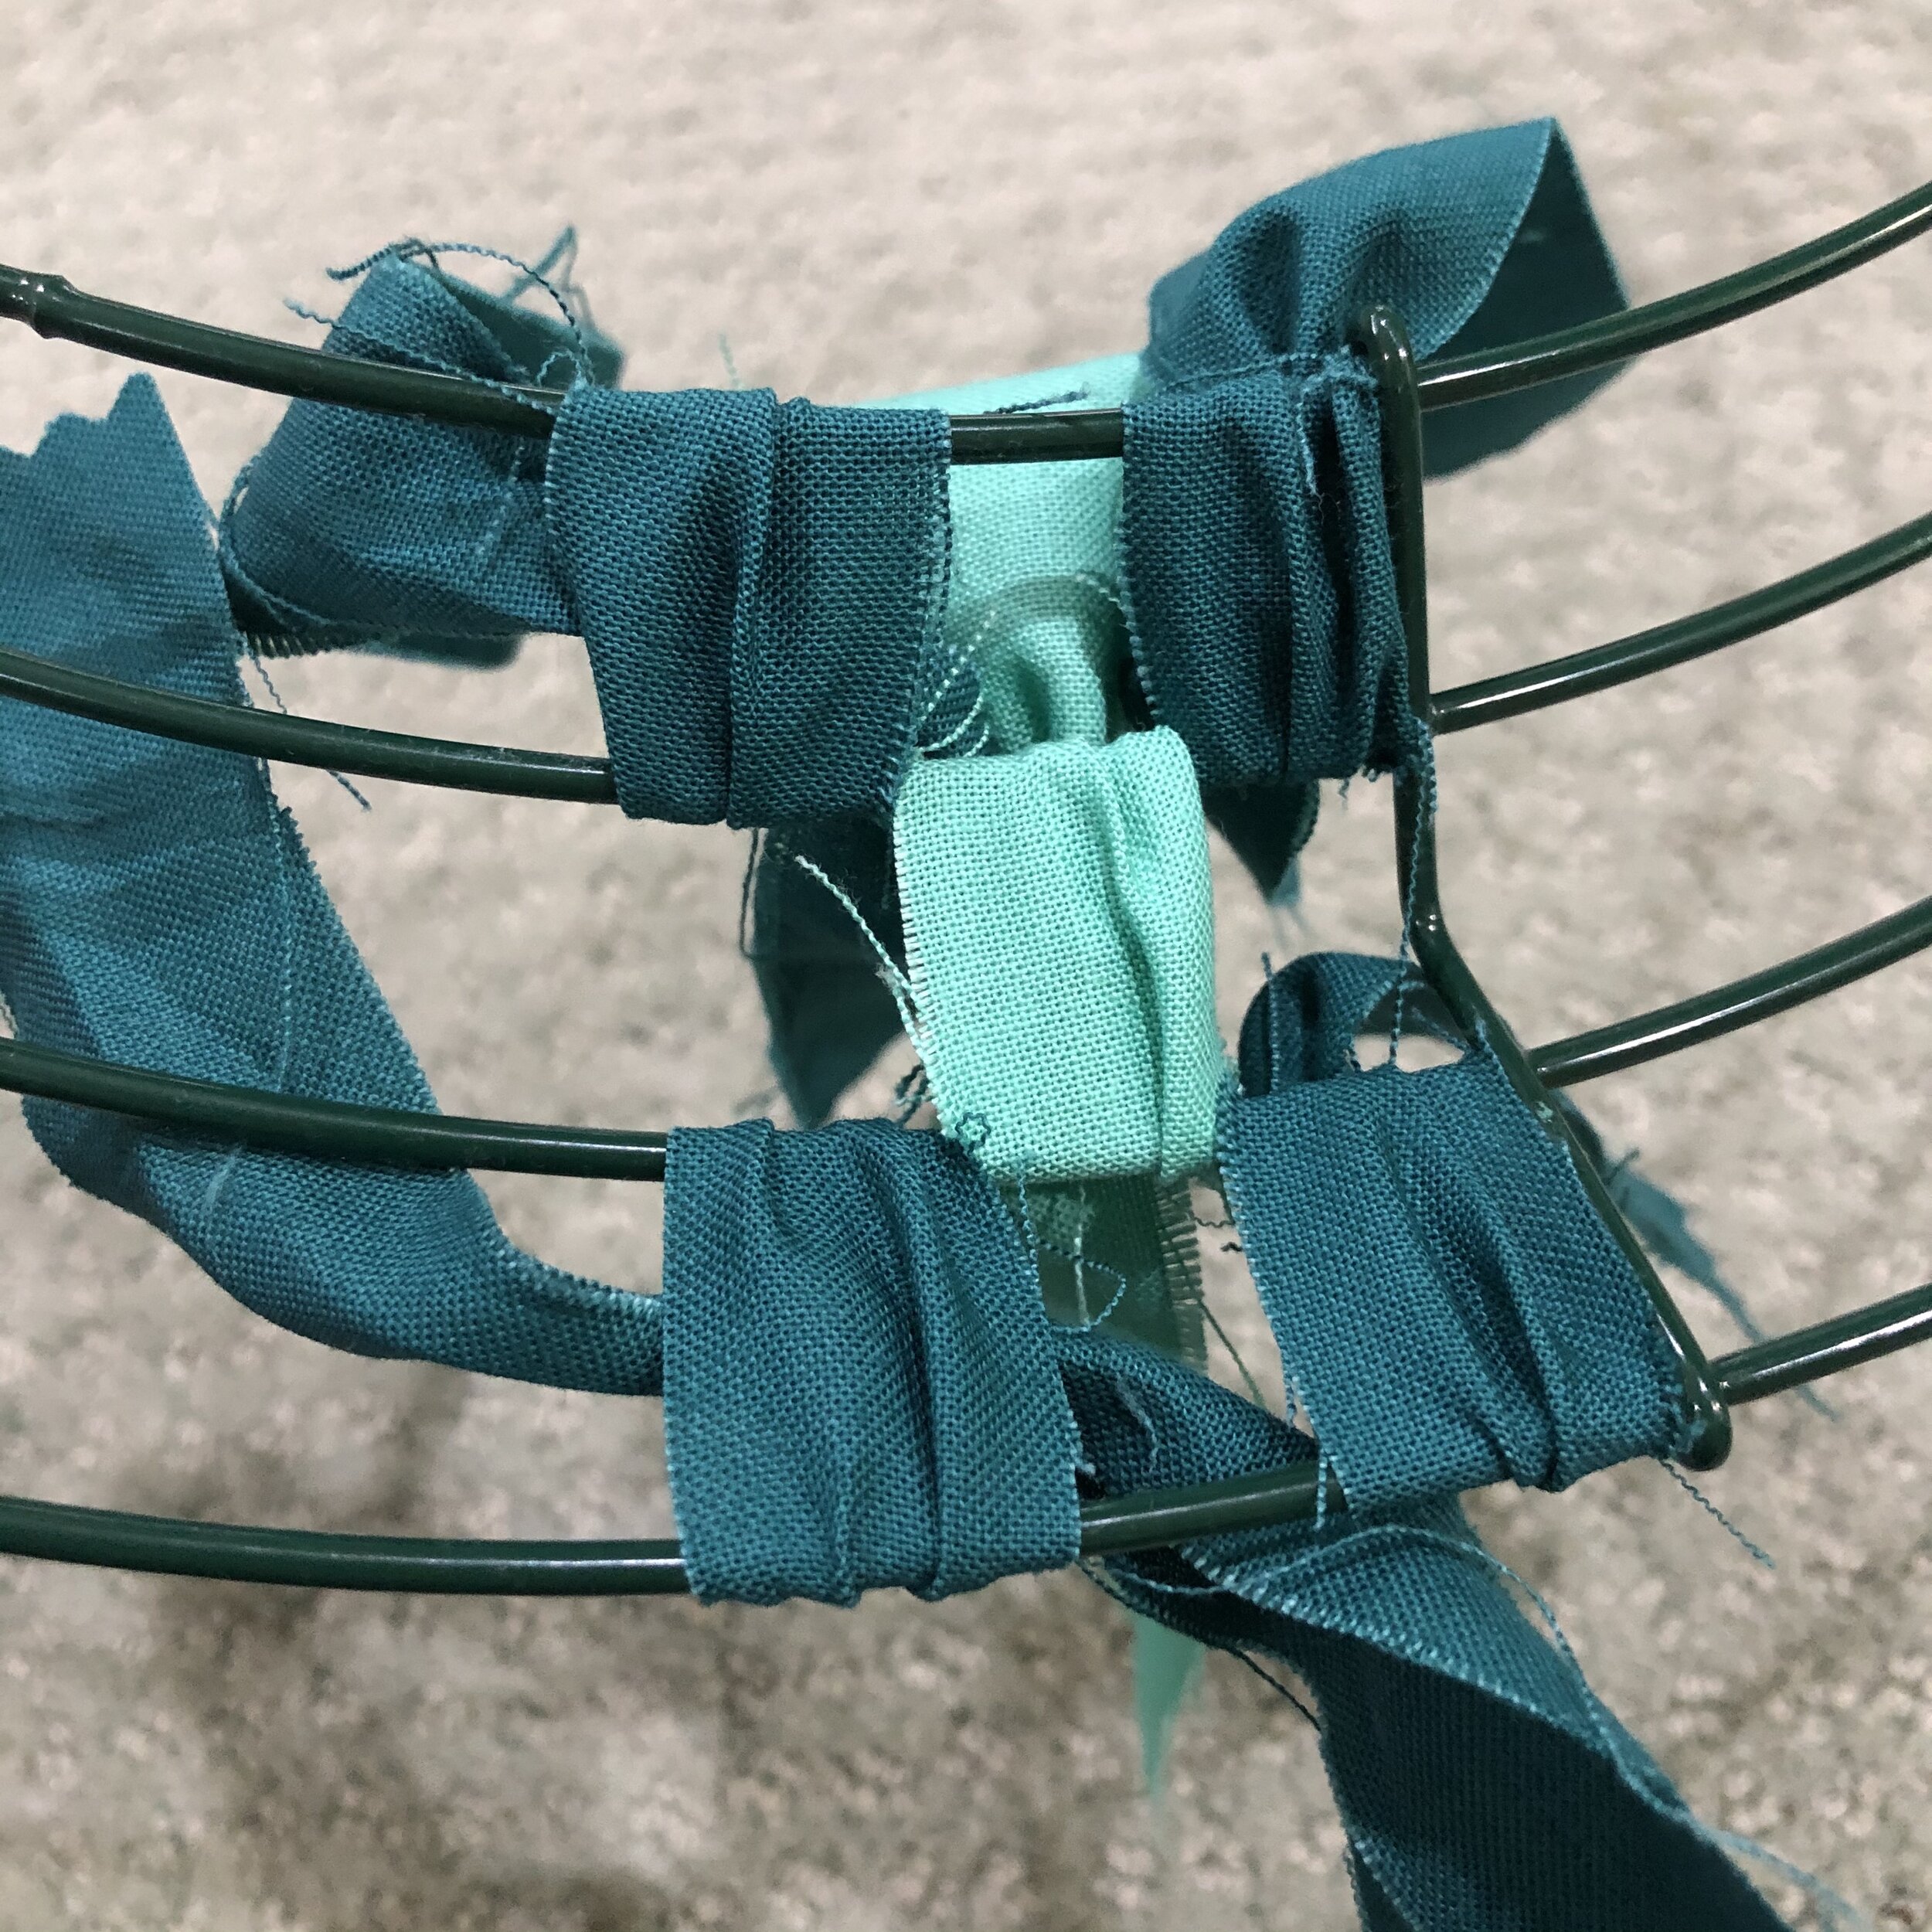
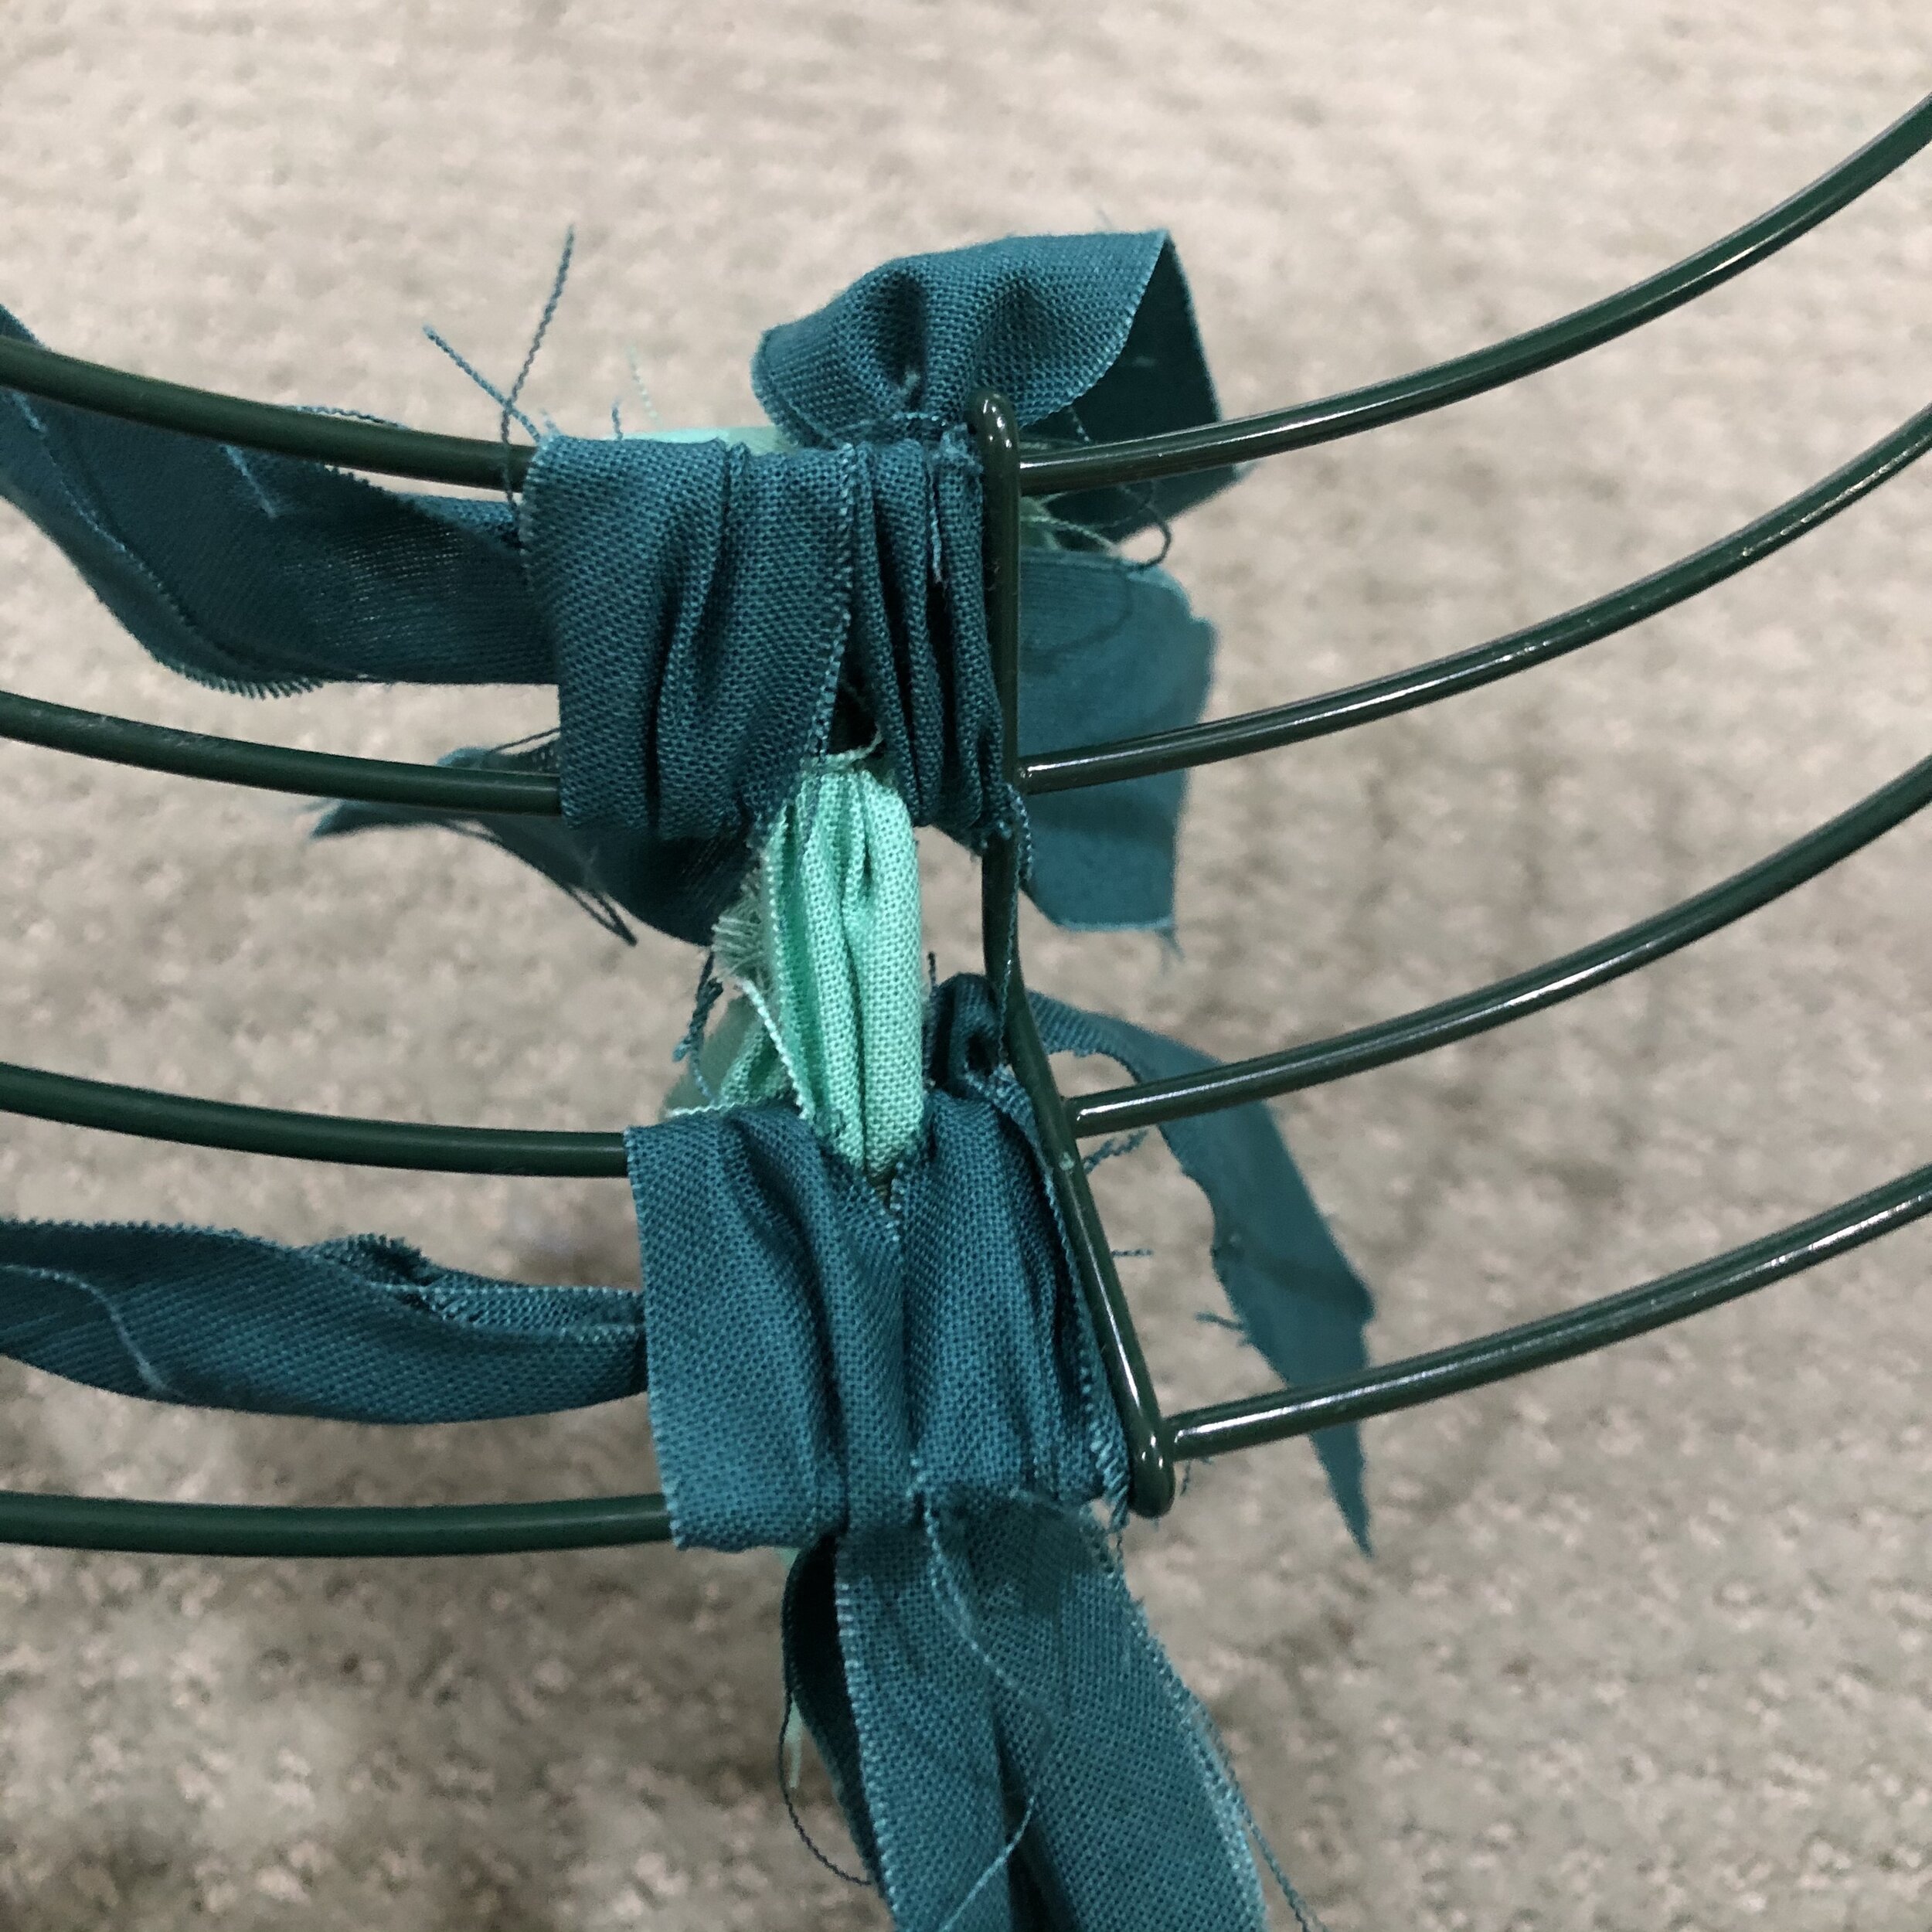
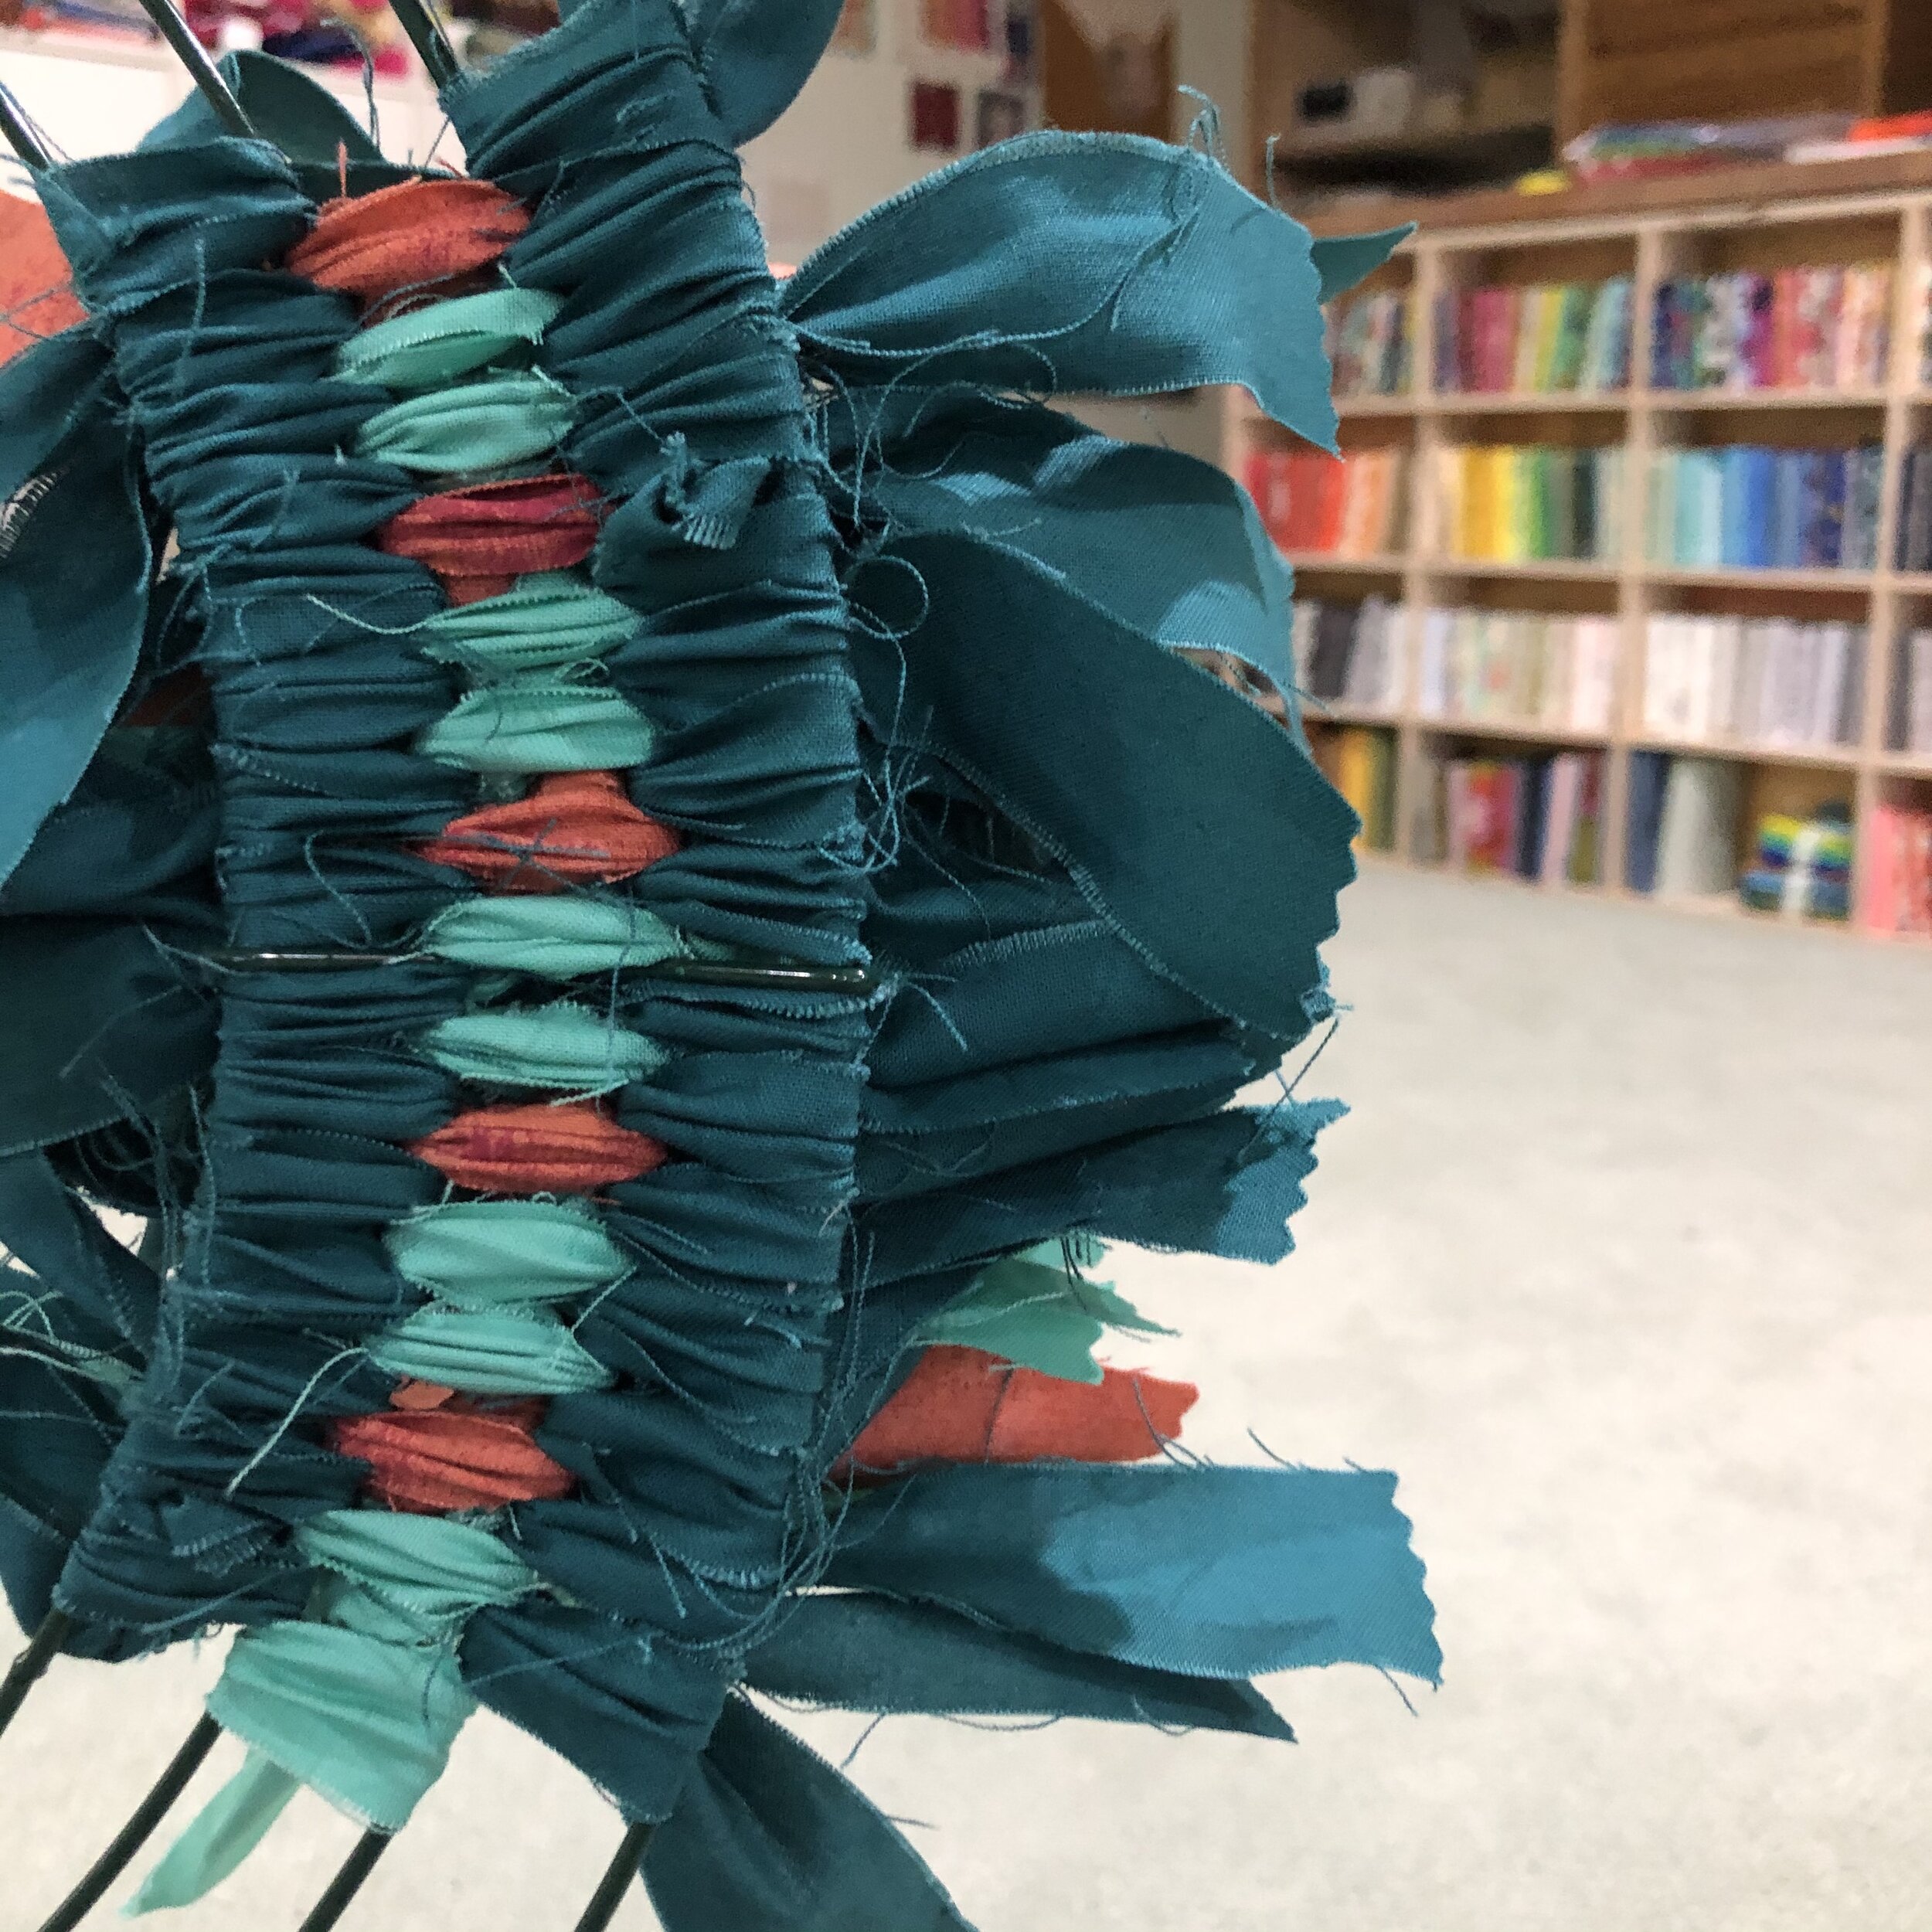
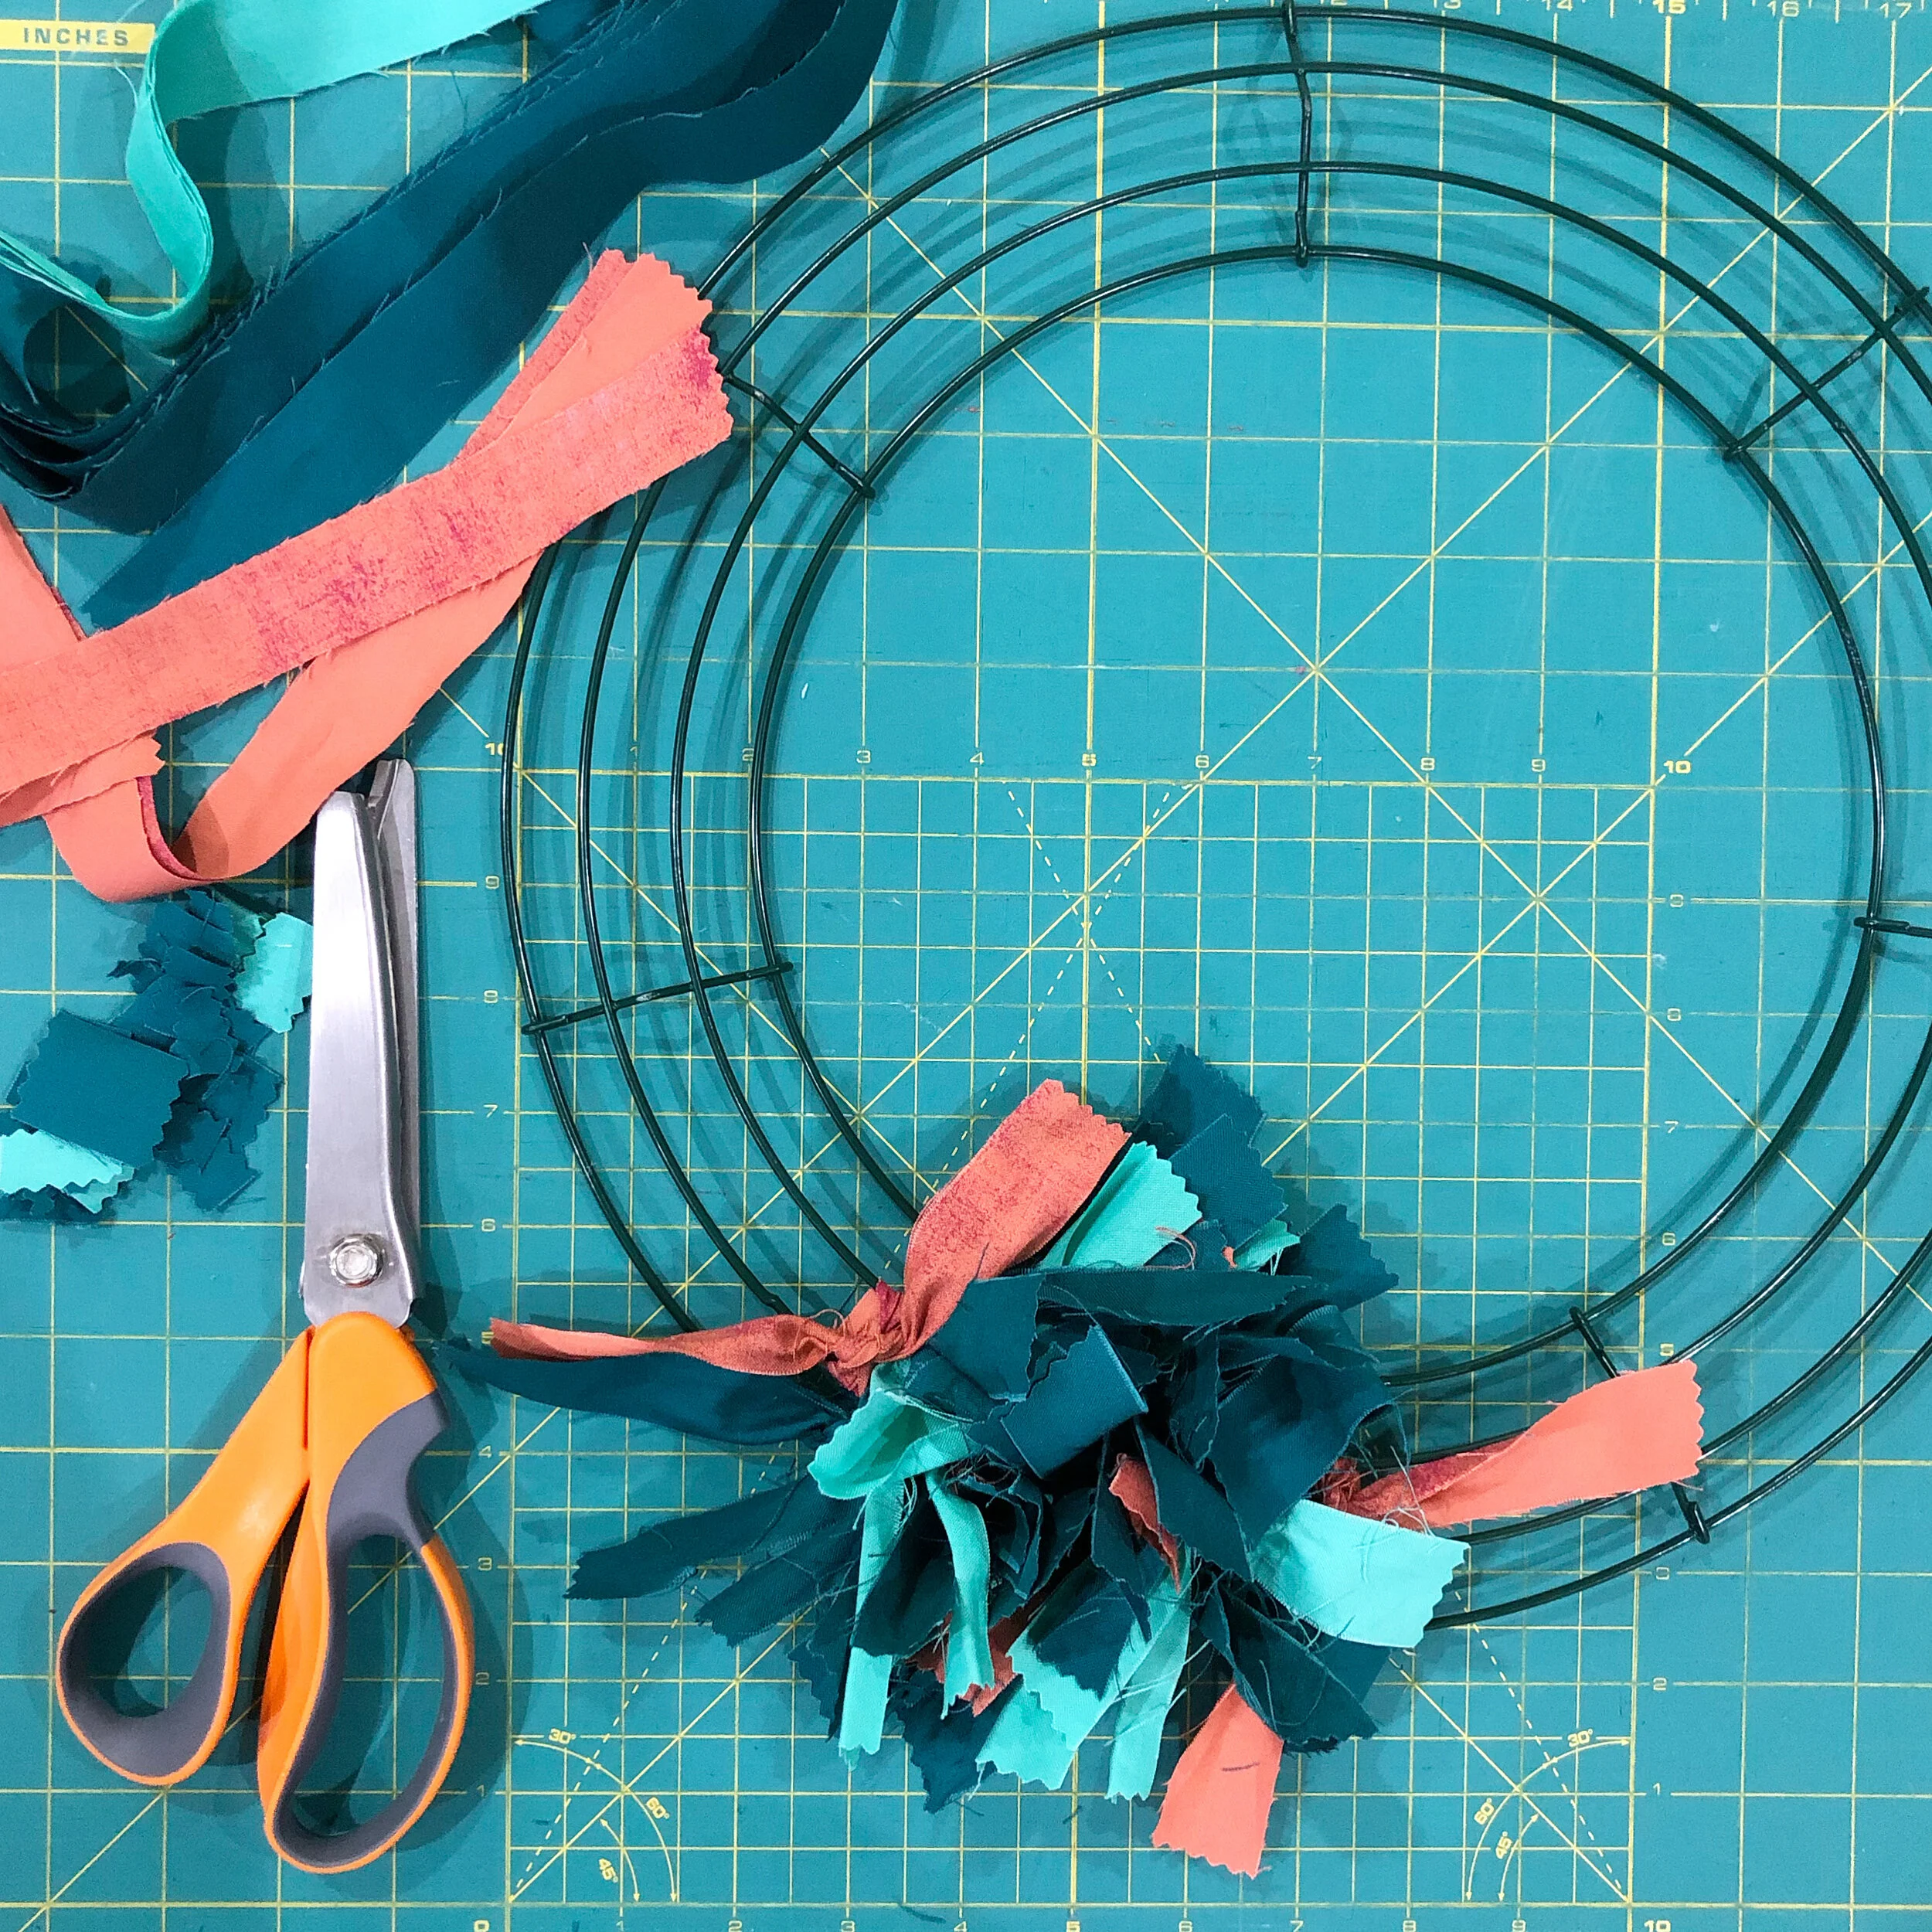
Cut fabric into 1” x WOF strips
Sub cut 1” strips into 1” x 9” strips
Tie strips around two wires on the wreath frame and double knot. I followed a pattern throughout, with dark green on the outside and inside, and the light green and orange in the middle. I did two light greens, then one orange. This was meant to mimic how the colors appear in the print I chose for the bow
Scrunch the tied strips to fill in the gaps as you go
Trim ends of strips to desired length
Fluff and determine if strips need to be trimmed or added
The Shapeable Fabric Bow:
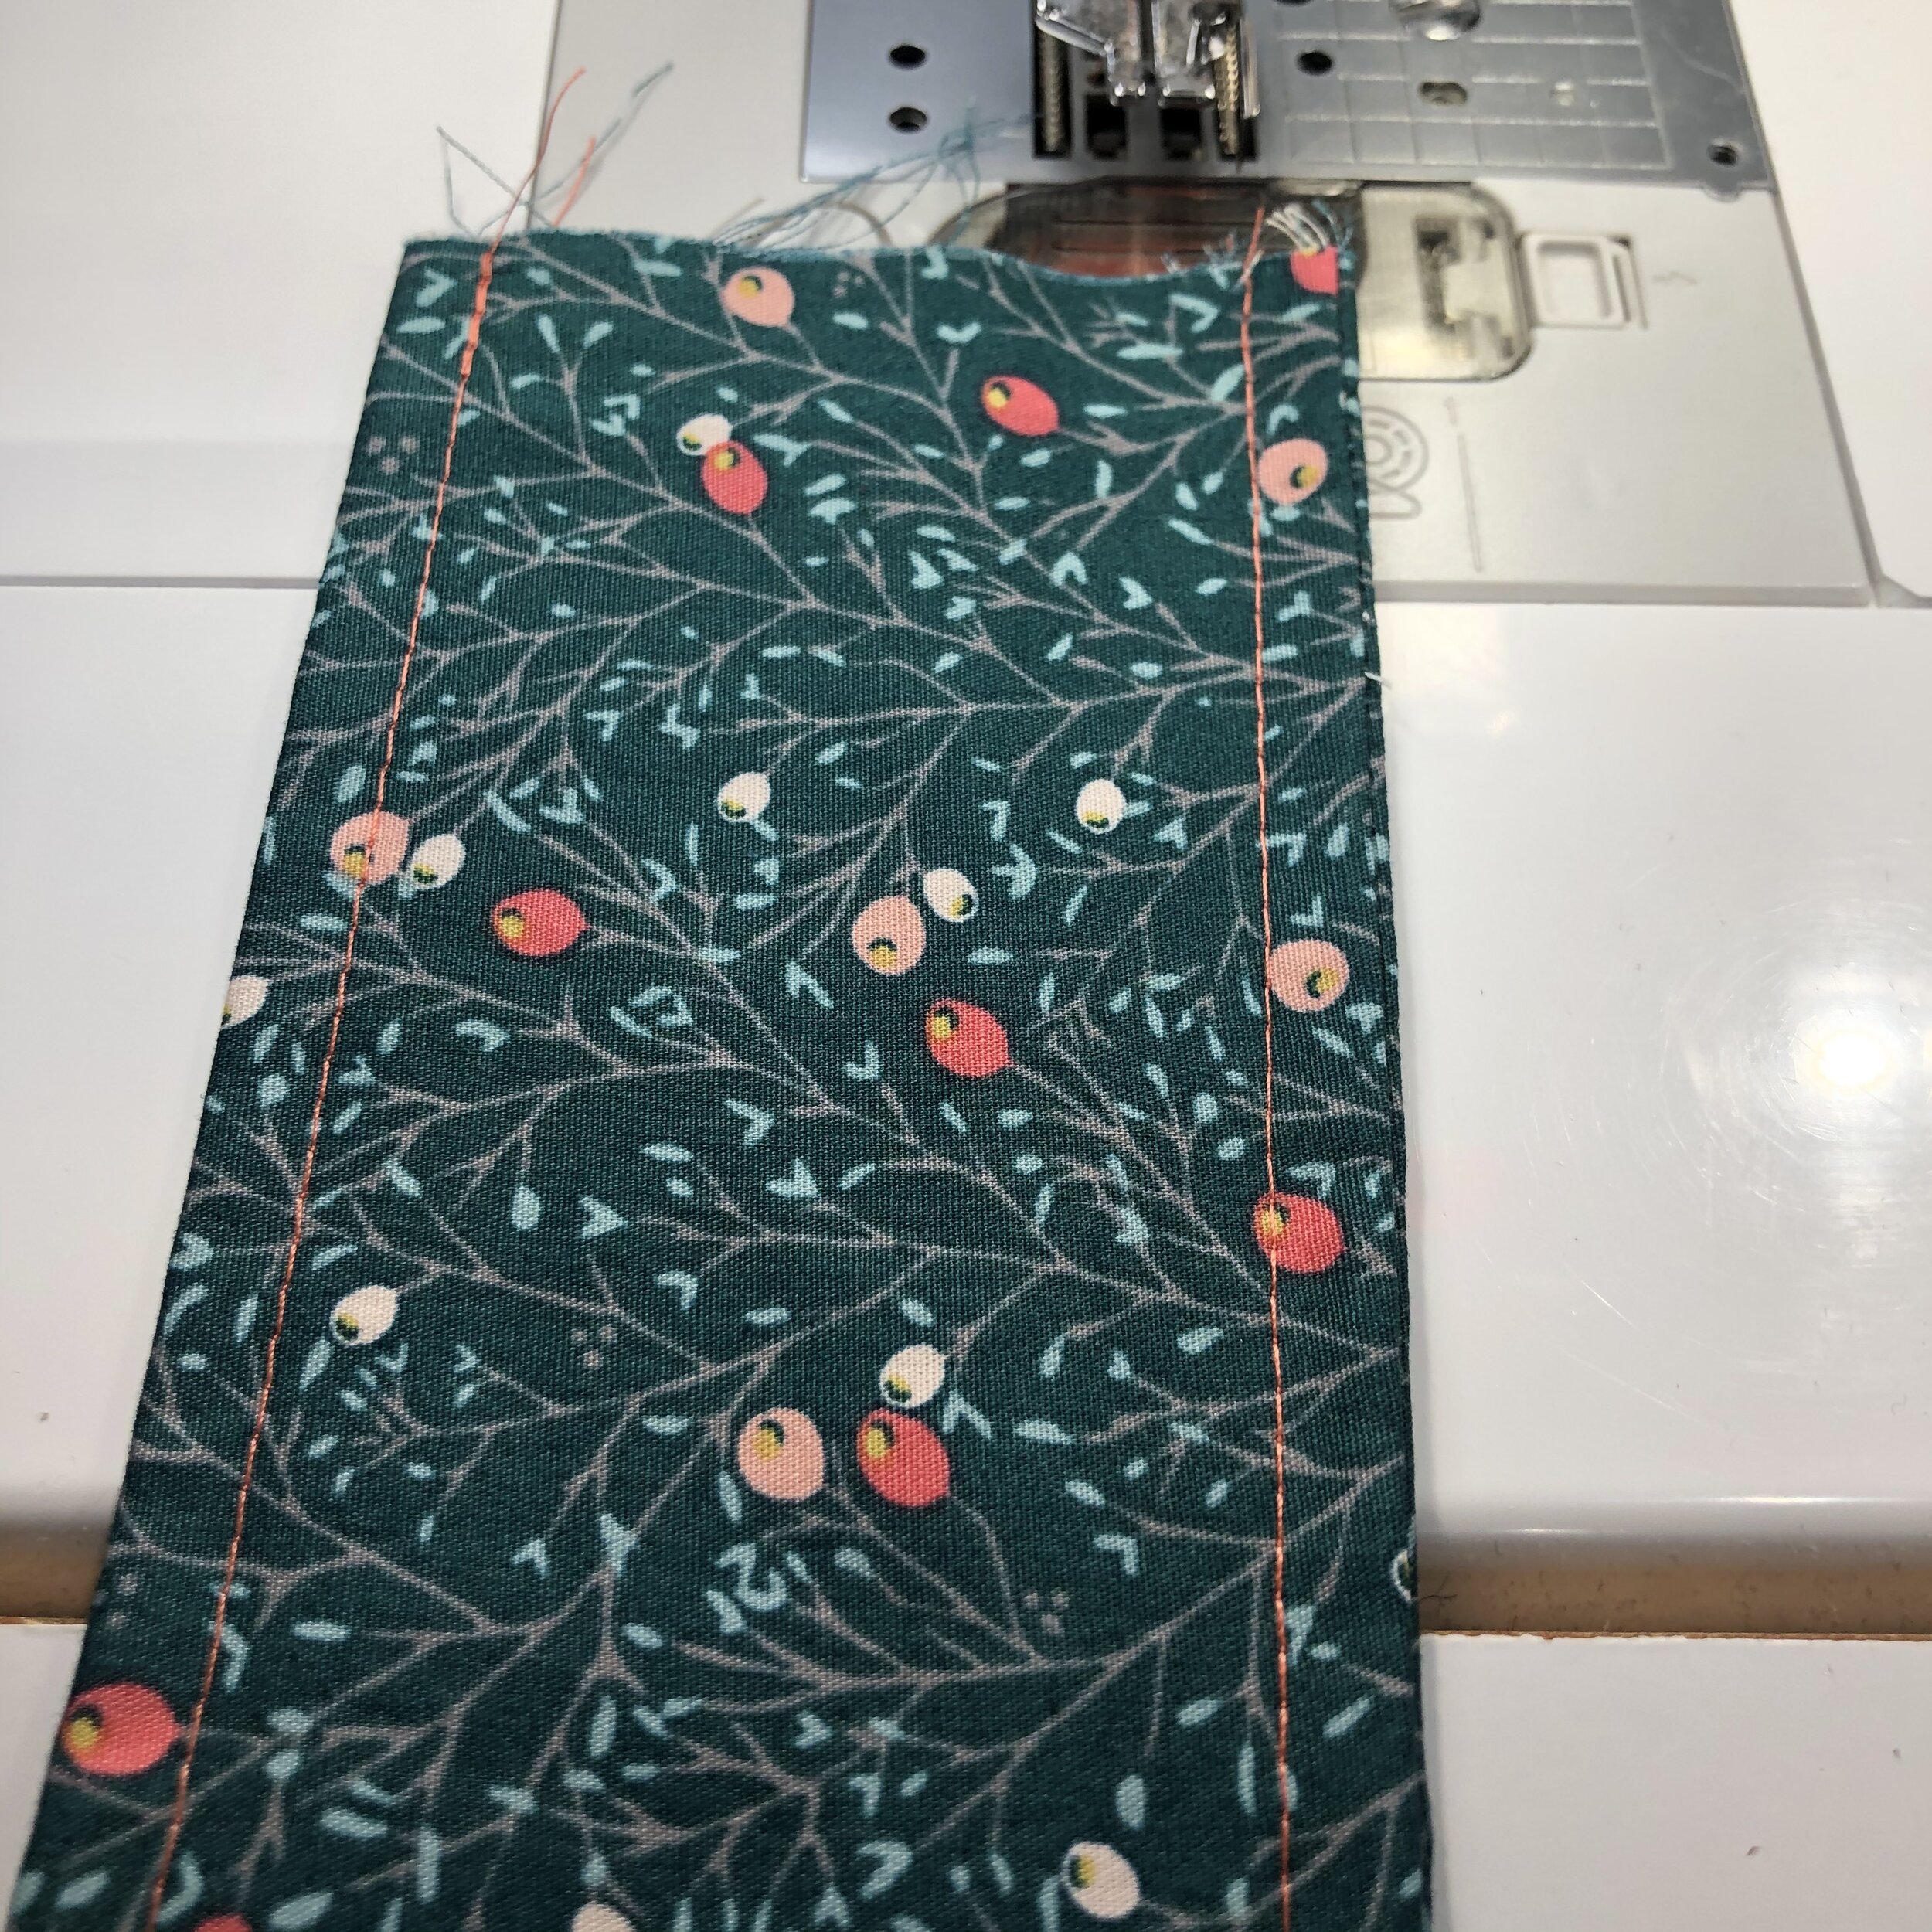
Trim selvedge edges of bow fabric
Cut 1/3 yard of bow fabric in half lengthwise, for two pieces measuring 6.75” x 40”
Sew them end to end, creating a length of fabric that measures 6.75” x 80"
Fold in half lengthwise and sew along raw edge side and along one end to close
Turn right side out
Top stitch 1/4” along long sides and one end, leaving one end open
Practice tying your bow to determine how much you want to trim off the open end. If you like the length of the tails, leave as it. If the tails are too long, trim off the open edge to desired length
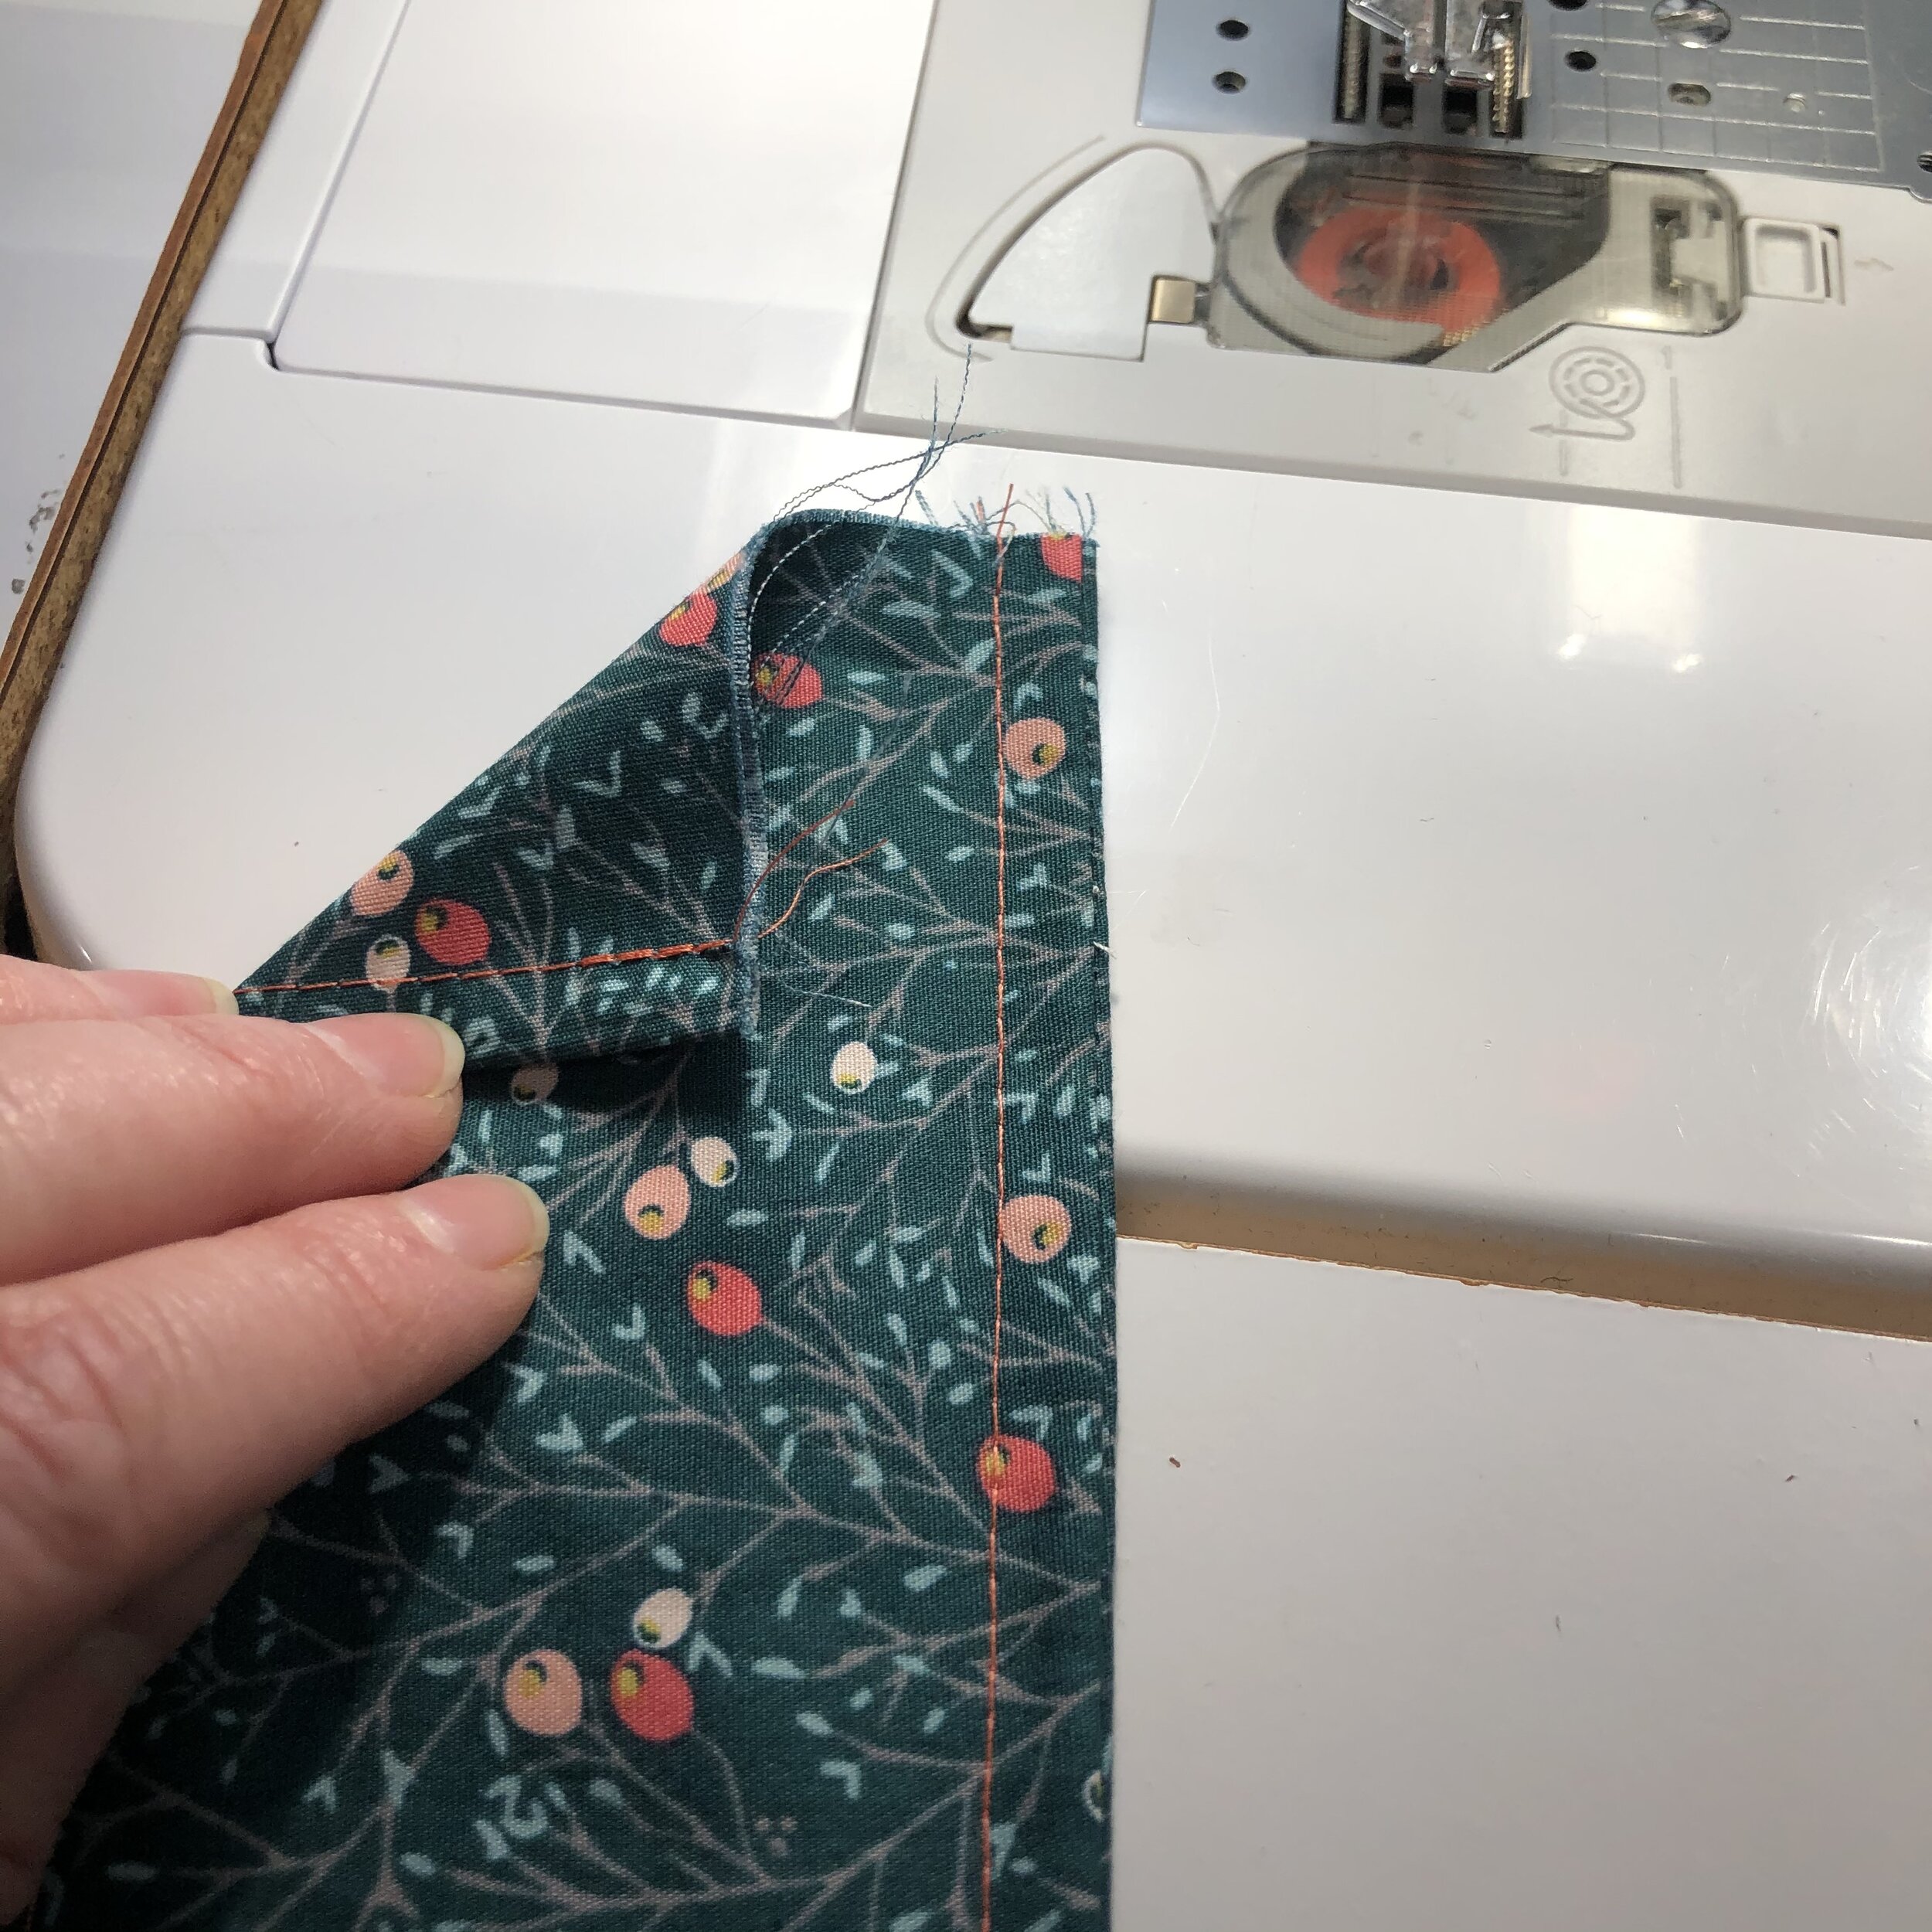
Cut two pieces of wire the length of your bow fabric
Curl the very end of the wire into a tiny loop and insert into the 1/4” topstitched seam you sewed in Step 12. You will slowly run the wire down the length of the bow. Repeat for other side.
Unsew with a seam ripper the top stitches about 1/2” in the open end. Fold under 1/4” into the end and top stitch closed
Tie your bow and carefully arrange it so it looks perfect
Insert a piece of wire into the middle of the bow to attach to the wreath where desired
I got some unsolicited feedback on Instagram that the next wreath I make I can use Christmas colors and make a Christmas wreath. Someone else told me it’s great because it’s so 80’s. Thanks a lot! Anyway, it’s done and hanging on the front door. I’m calling this a win.
I hope whatever you’re working on right now is enjoyable and meaningful for you!
-Tara